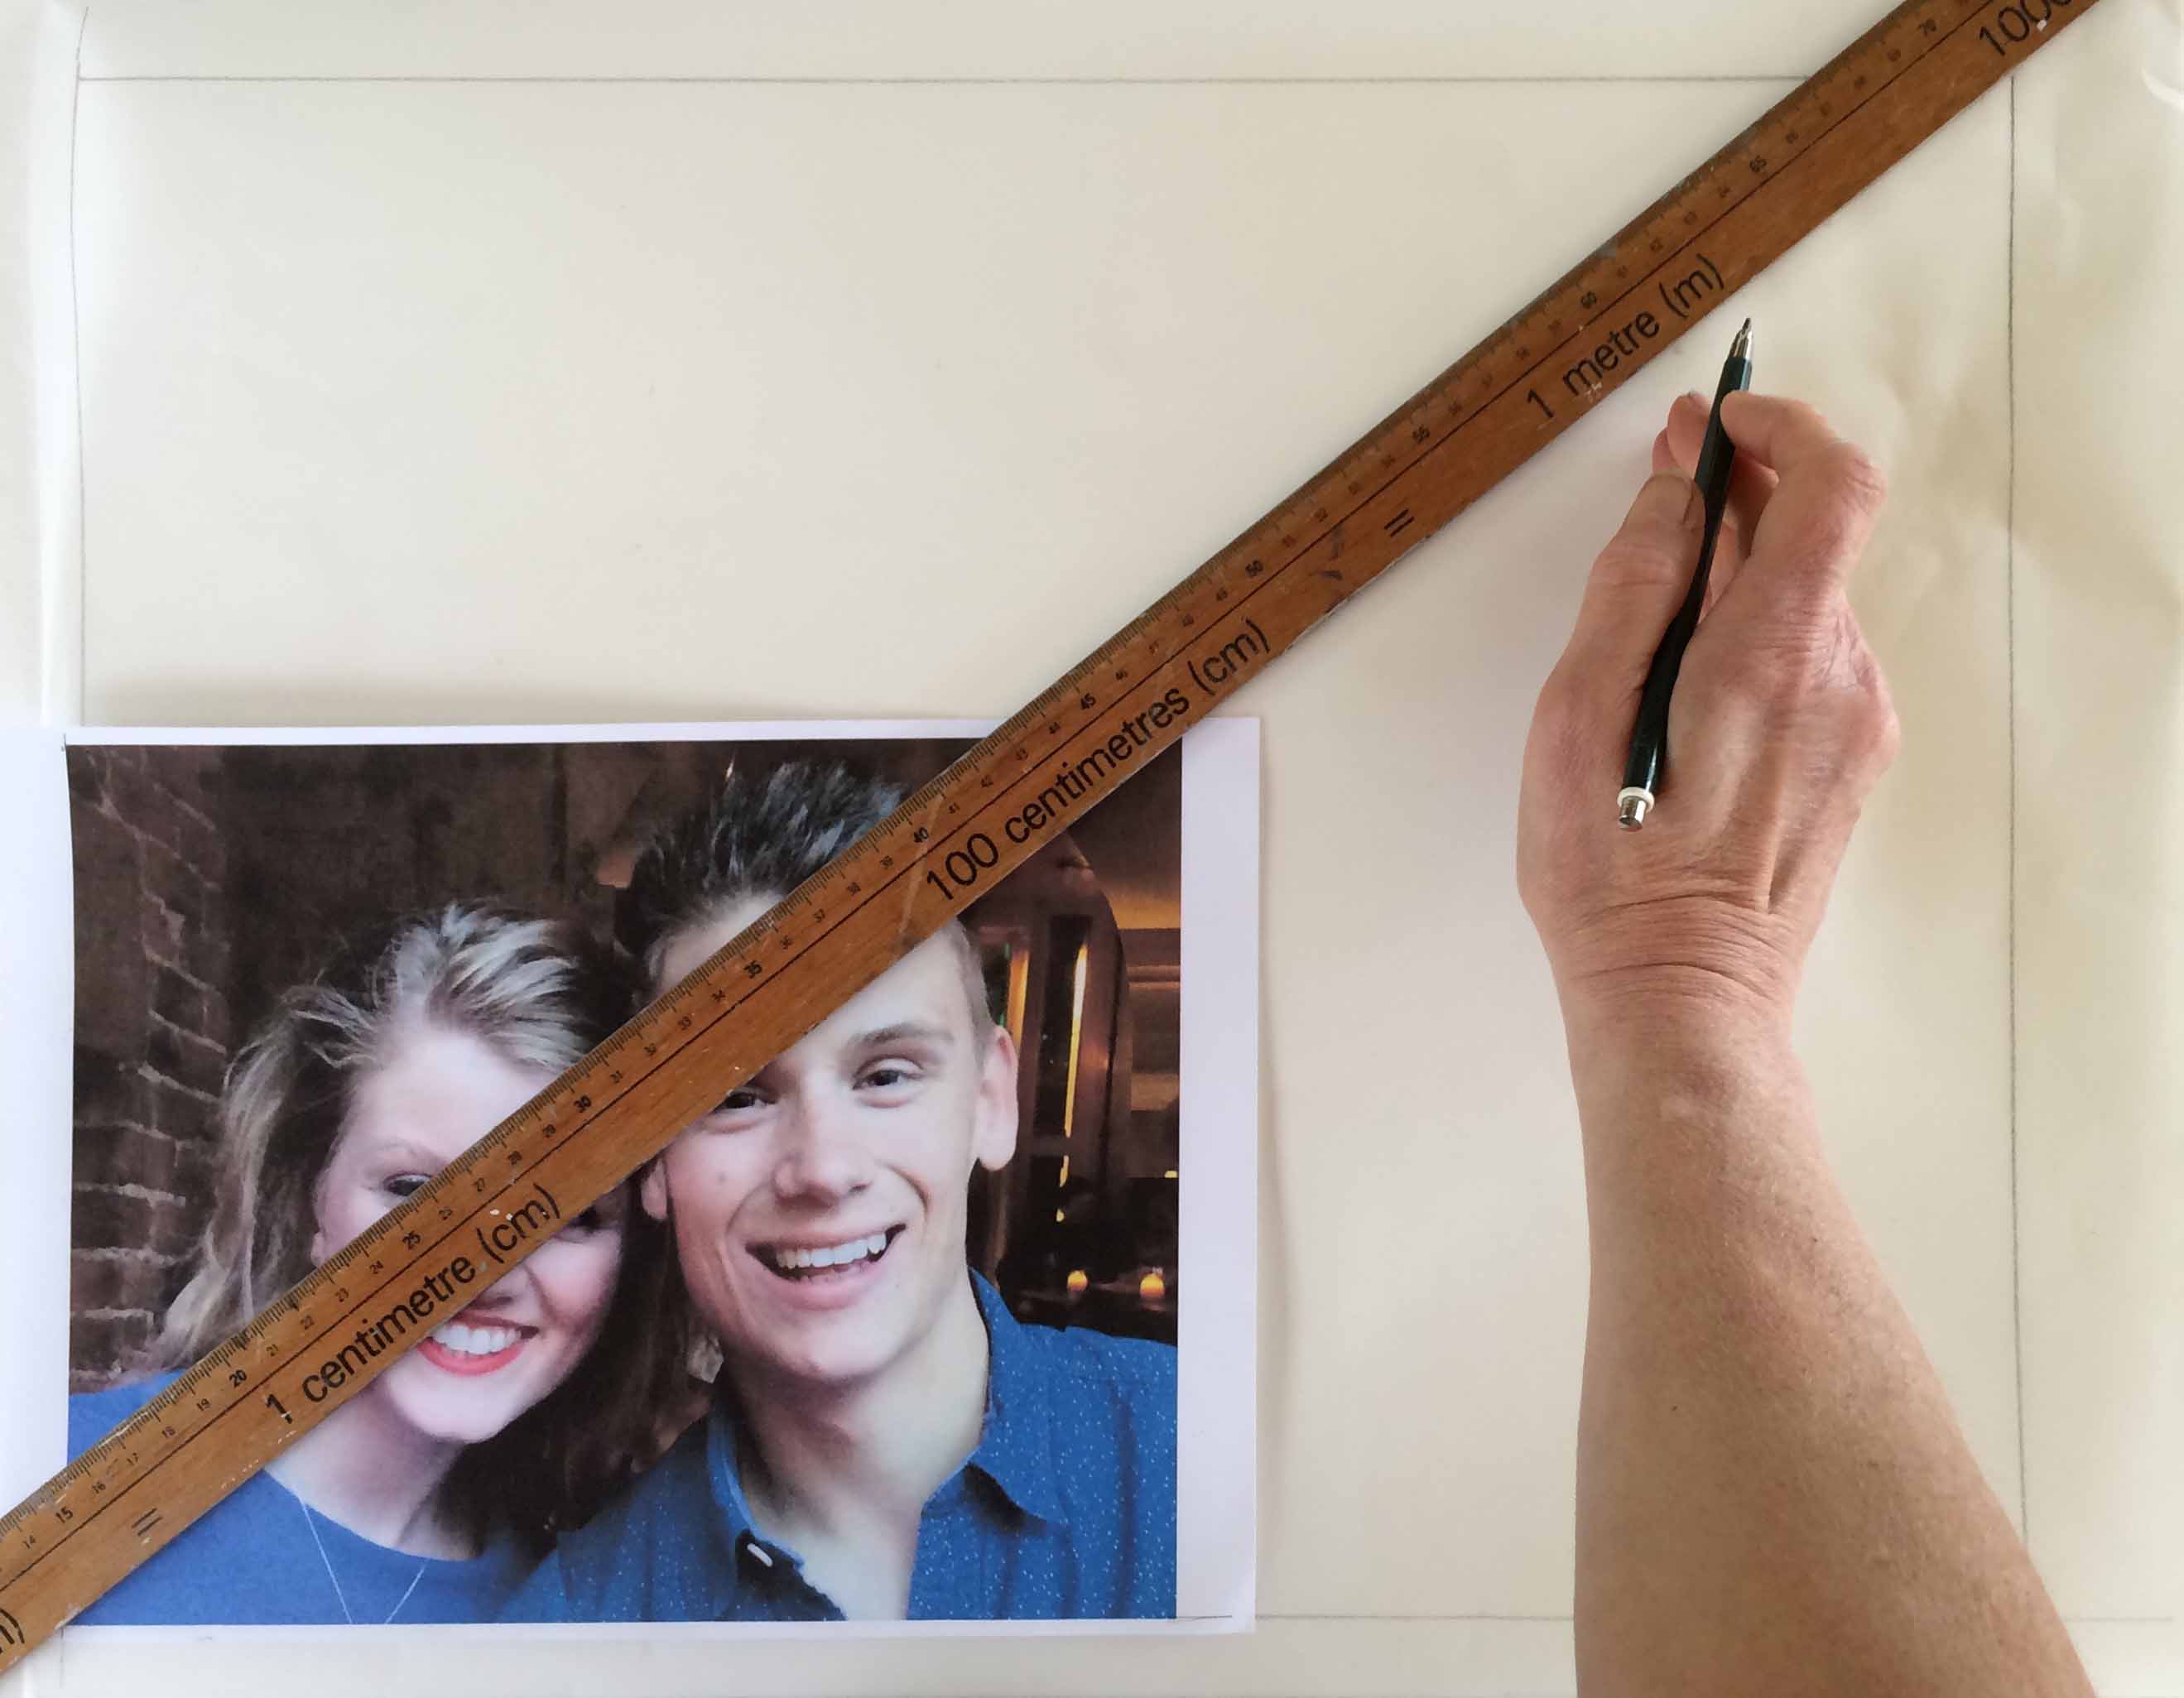
Obtaining a likeness in a portrait requires the accurate placing and sizing of the features within a well-shaped head. There are a number of methods to do this, one of which is gridding – drawing a grid on both the reference photo and artwork and then transferring the details from each square on the photo to the corresponding square on the artwork. This is all very simple if the photo and the artwork are the same size; however, if you wish to enlarge the photo it can get rather tricky. I quite enjoy a maths challenge and have often spent many hours trying to work out the width/height ratio of my painting to match the photo’s dimensions and dividing this into equal numbers of squares. However, for those who aren’t so inclined, I’ve devised a simpler, quicker method.
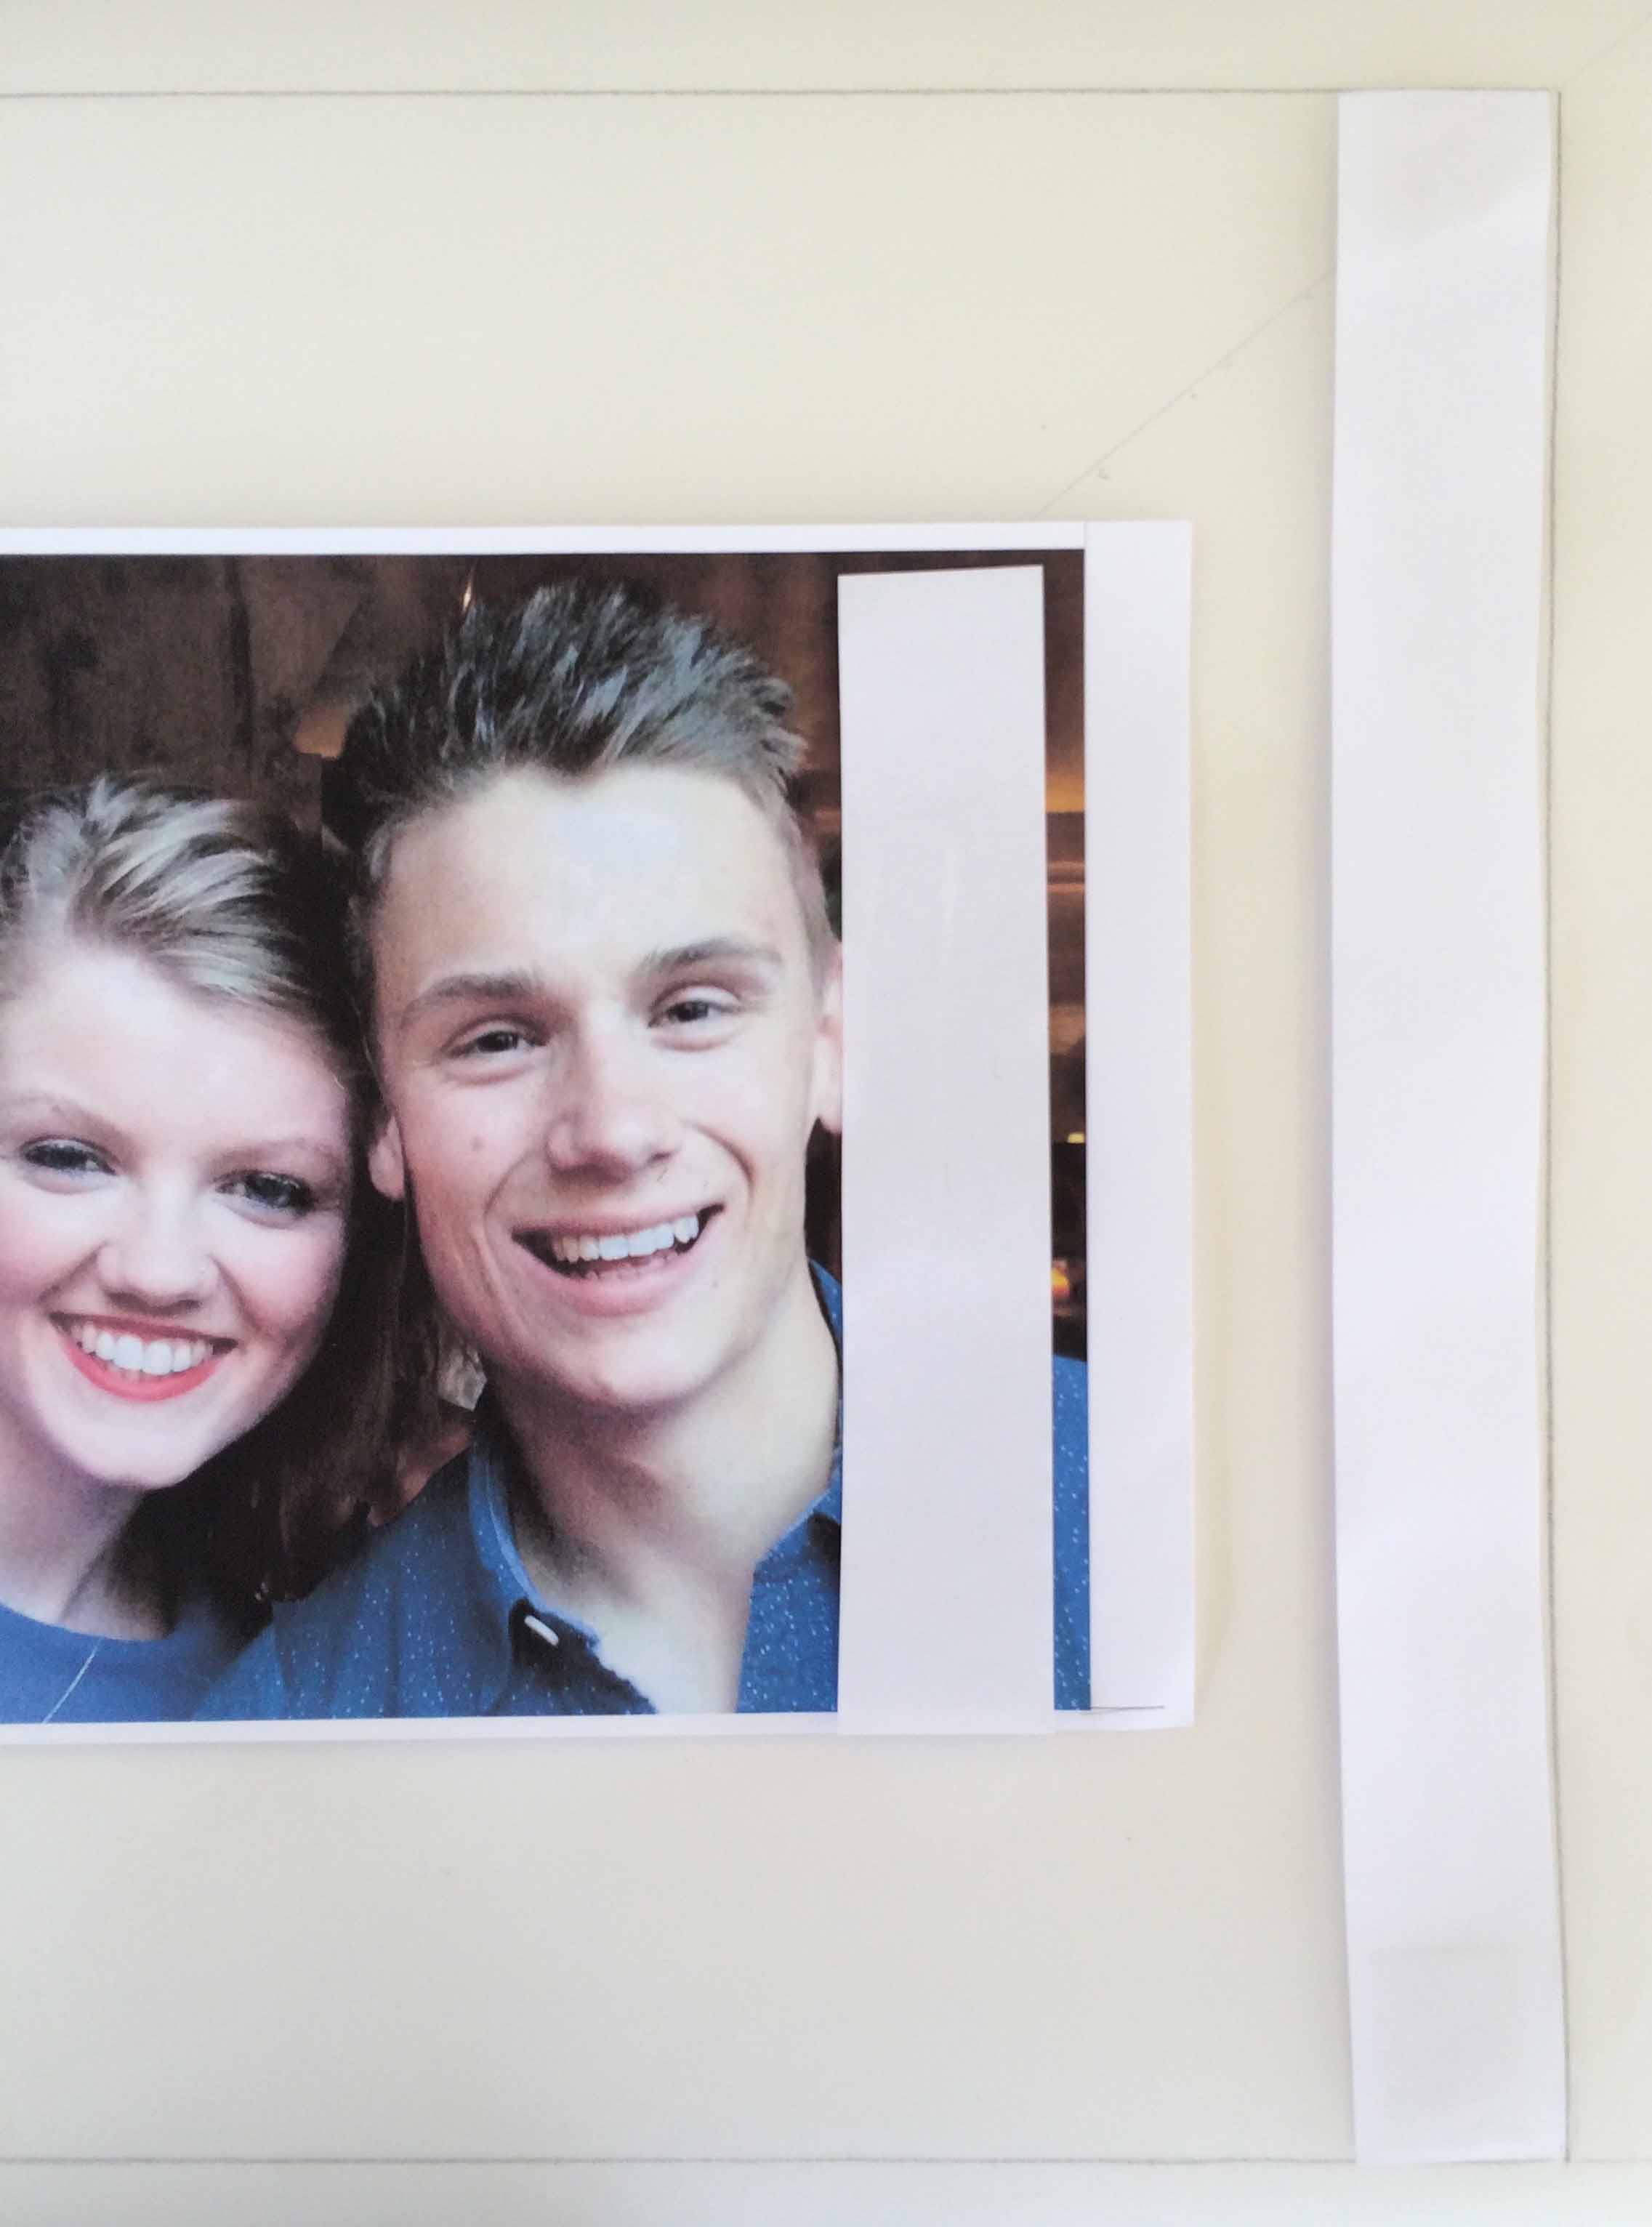
Firstly, you need to ensure your photo and artwork have the same relative dimensions – a square photo will need cropping if you want to paint on a long, thin canvas. A simple way to do this is to use the diagonal. Mark the left and bottom boundaries of your artwork, place the photo in this bottom corner of your artwork and mark diagonally from that corner, through the top corner of the photo to the top of your artwork. The top and right boundaries need to form a corner on this diagonal.

This is fine for painting on paper where the size of your finished artwork doesn’t have to be determined by your support. If you’re using box canvas or board, the relative dimensions of your painting are already set. Check the diagonals of the canvas with the photo and crop the photo accordingly.
I’m going to be painting on natural linen and don’t particularly want to cover my canvas with grid lines so I’m using some tracing paper to grid onto and will transfer the resulting image to the canvas using TraceDown.
To divide the reference photo and the artwork into the same number of rows and columns, rather than scratch your head over the maths, take a couple of strips of paper and cut to the length or width of your artwork and photo. It doesn’t matter whether you choose length or width, just make sure it’s the same dimension for both.
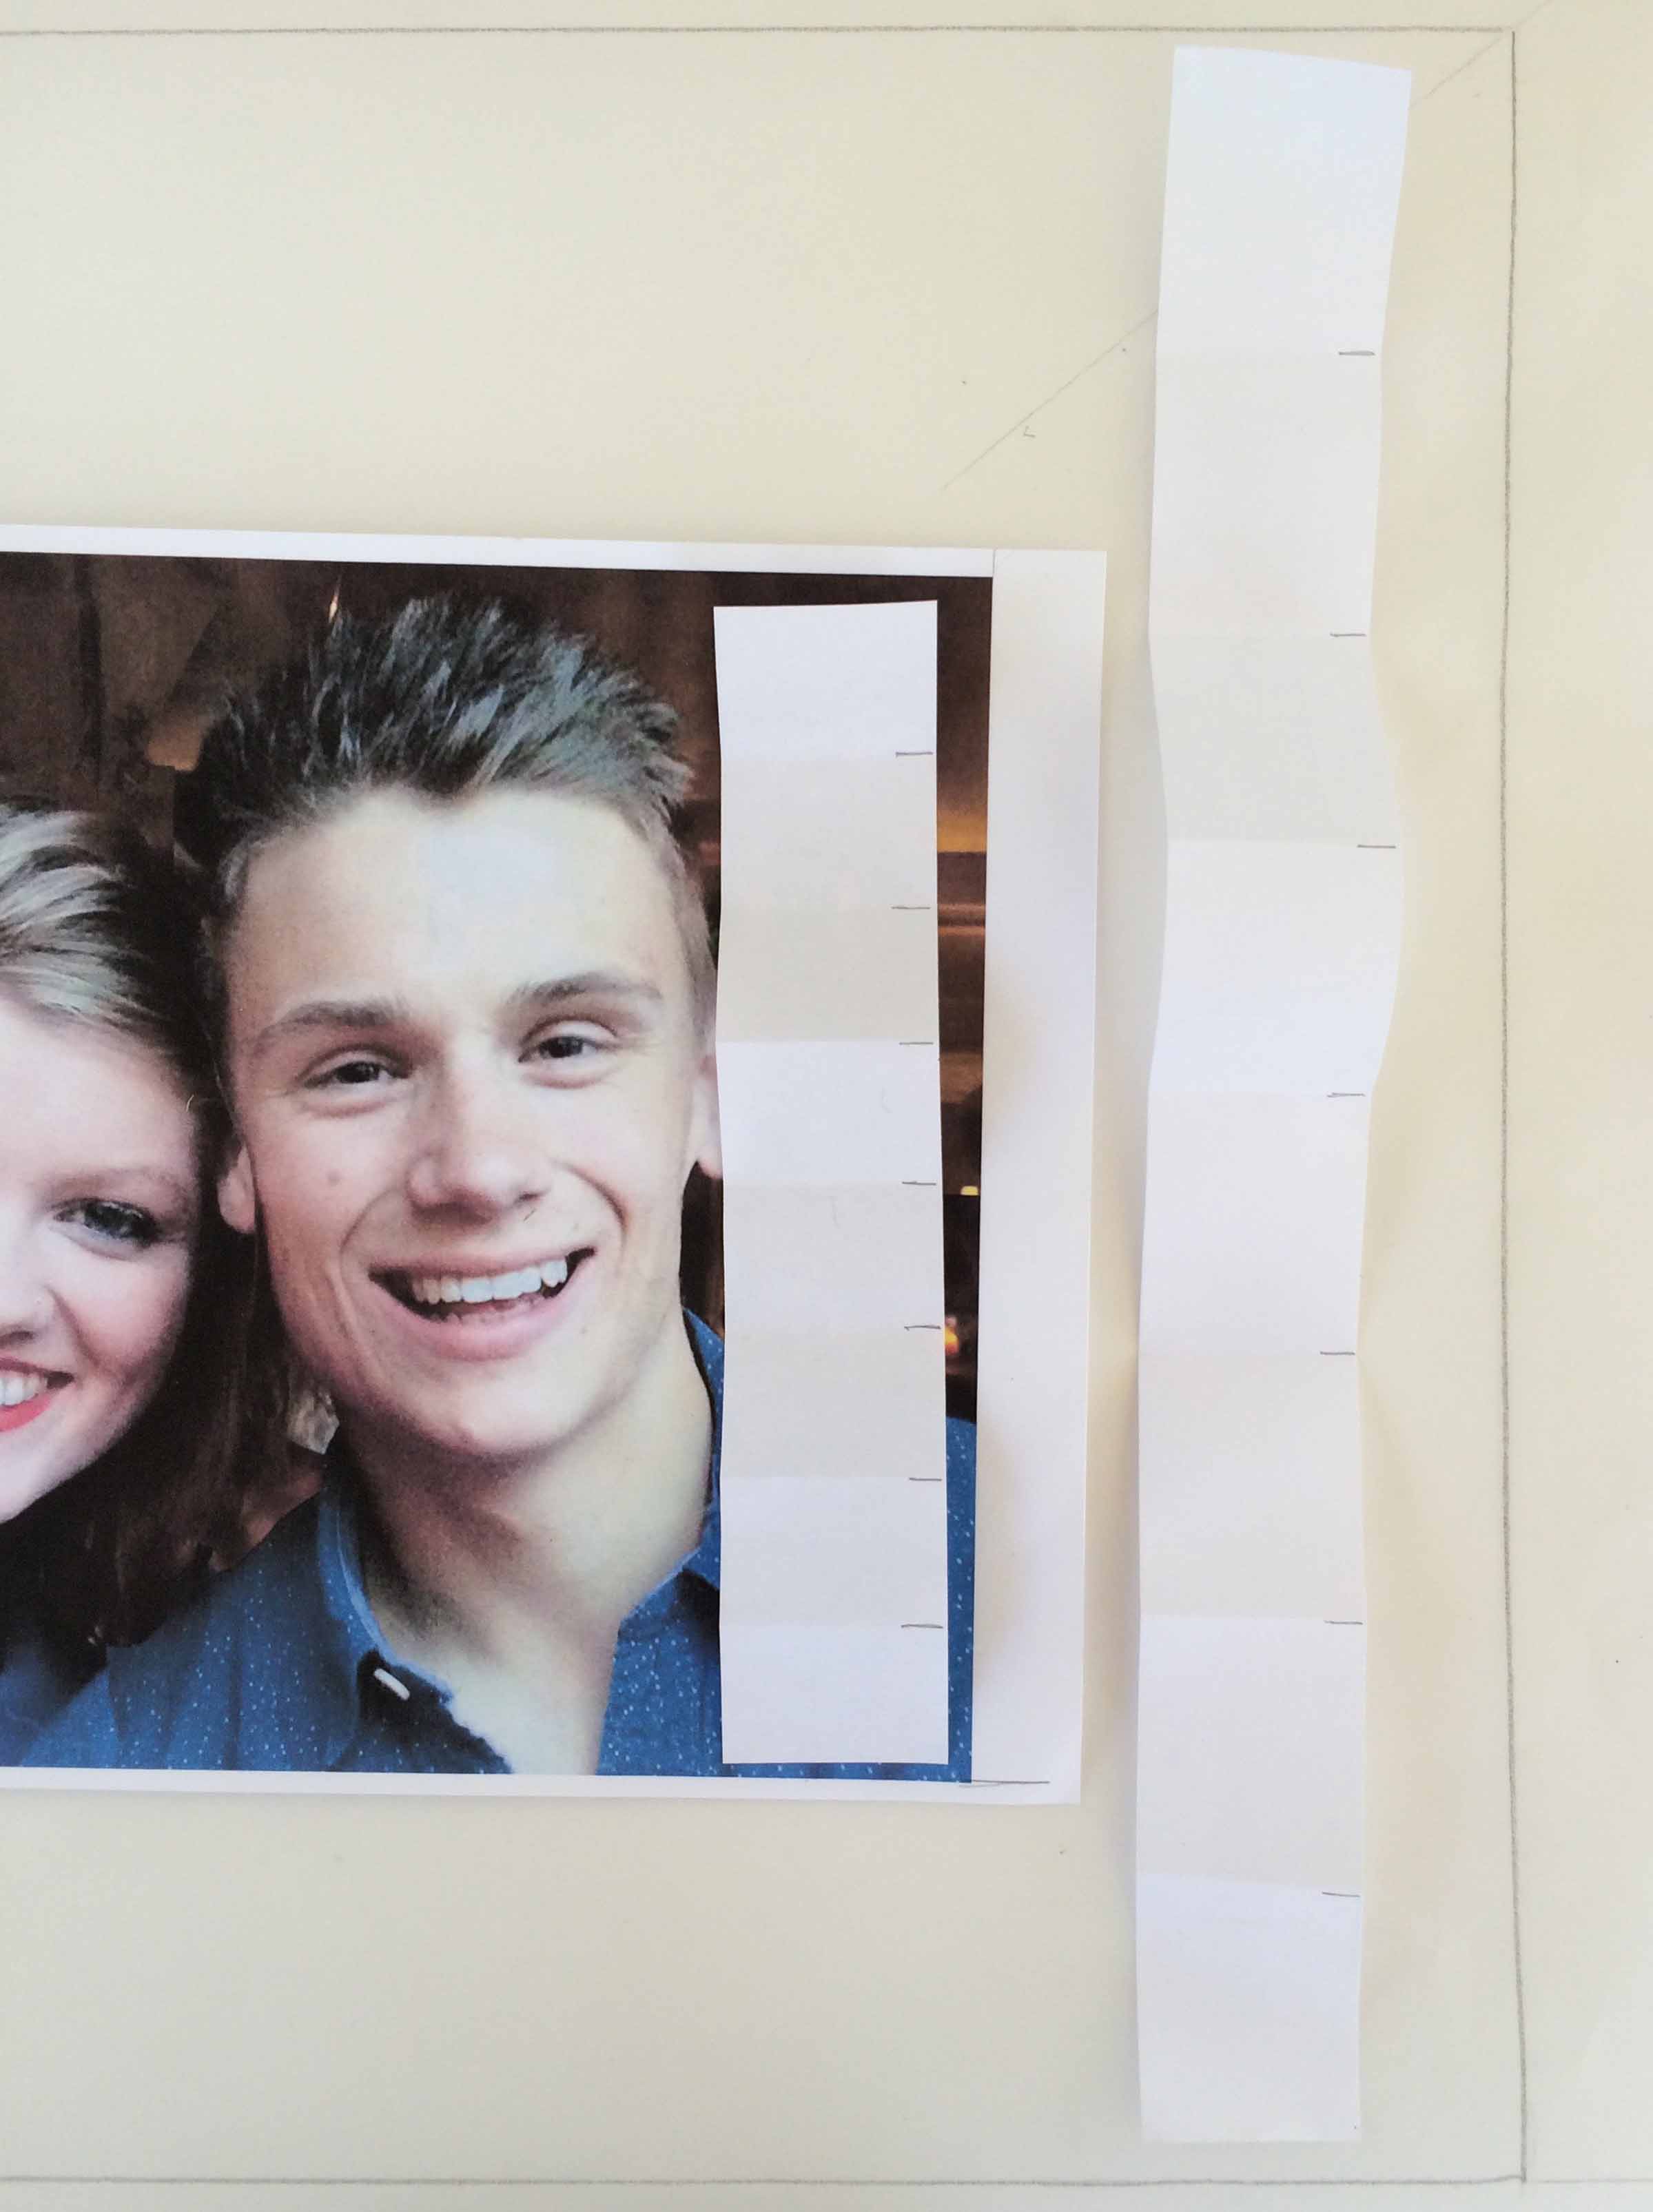
Fold each strip of paper very accurately in half lengthways about 3-4 times; make sure you fold both pieces of paper the same number of times. You should now have 2 strips of paper, differing lengths but divided into the same number of folds. This is going to be our marker for the grid. You might find it helpful to mark each crease so it’s easily seen.
Use these strips to mark out your grid lines. Don’t worry if one of the sides doesn’t divide neatly into the folds on your strip - it will be the same for photo and artwork – just make sure you have the part block at the same side for both. I find it also helps to mark diagonals in the squares over the features – this gives greater accuracy to the portrait.
I like to laminate my reference photo – it protects it from paint or liquid splodges and I can grid using a china marker. Once I am happy I’ve got my image replicated, I can wipe off the grid lines and can see my photo clearly. When trying to colour match, I can also pop a dash of paint onto the photo to see how close I am, then wipe it off. If I’m gridding directly onto my artwork, I use faint pencil marks for a drawing, or a water soluble pencil for a painting – bear in mind you’ll not want to see these lines when you’ve finished.


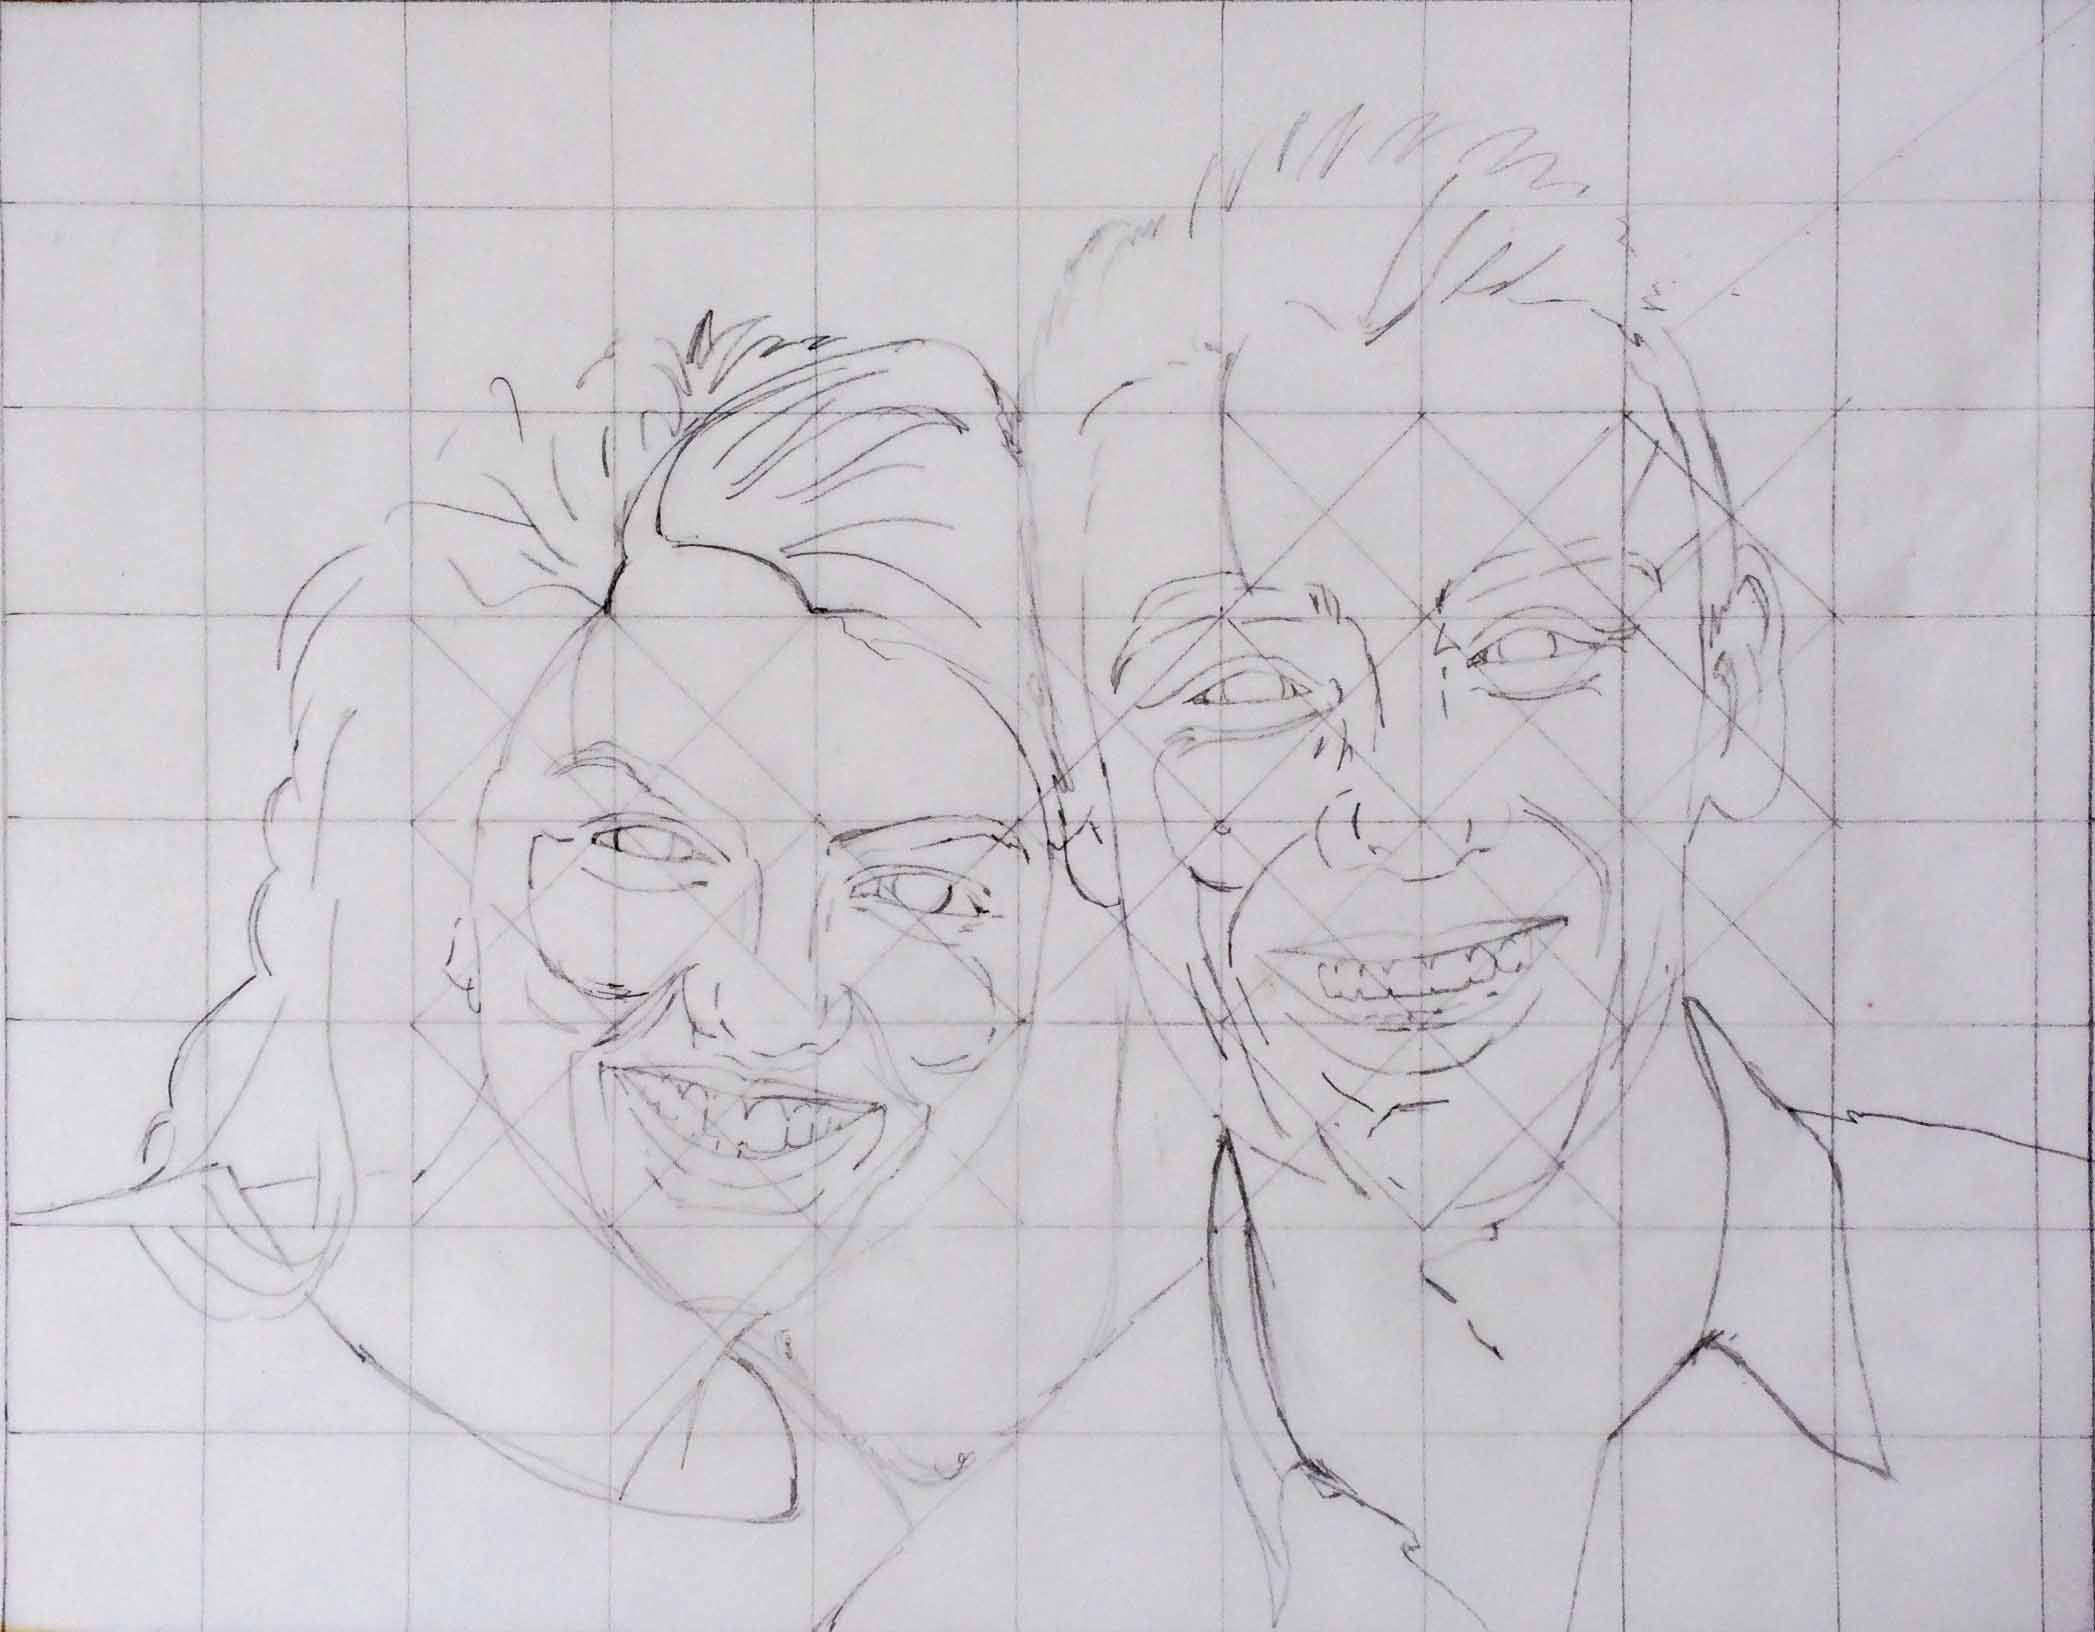
Now simply start matching squares and filling with information. I find it helpful to look for an obvious crossing of image with grid lines not too far into the photo to start me off – here I’ve started with part of Anna’s hairline which fits neatly into a square 3 rows down and 4 columns across. Do take care counting the first squares when you start. You don’t need masses of detail – draw basic outlines, outline areas of shadow, anything that may be useful when you come to painting. The key is to get placement and size correct.
Assess to make sure your image looks sensible. I know we’ve been using a grid and it should all be in the correct place, but we can still lose it a bit along the way. If something doesn’t look right, it’s often only a slight alteration to make it work. Add the diagonals if you haven’t already. Draw lines running from the bottom or tops of the eyes to check that they are level. Don’t worry if the drawing looks odd at this stage; this is not the finished piece but it contains all the info you need to complete your painting with confidence
Here are some tips for choosing a good photo for a portrait painting.
Obvious I know, but make sure the photo is a good representation of the person to be painted – your picture can only be as good as your reference material unless it’s someone you know really well and you have a good memory!
Look for a good contrast of lights and darks; modern, professionally taken photos are lovely but are often very bright with little shadow so they don’t make good sources for a painting. On the other hand, make sure there are no awkward shadows falling across the face unless you are happy you can paint the dramatic effect it’s making.
If you’re new to portraits, choose a face that is looking straight on or slightly turned. Part profiles can be tricky.
It’s also easier to draw faces with closed smiles rather than a mouth with a row of teeth. I have no choice with my reference; Charlie and Anna are smiley people so I’m going to have to take care when it comes to painting.
Janet Williams 43936
Hi,
Just wondering if you have this on video I am not very good at working this sort of technique out but perhaps a video demo would help!!
Thank You
admin
I don’t currently have this on video but I think your suggestion is a good one. I shall certainly look into producing a video and will let you know when I have done so.
David Ison
Yes, I’d like to see a video too when you have produced one
Bill Carlson
At last an easily understood gridding system! Thank you Jackie.
Your video of the p0rtrait of the girl’s head is very helpful.
admin
Thank you Bill. Really appreciate your comments. I’m all for making things as easy as possible, it gives you more time to enjoy the painting process.